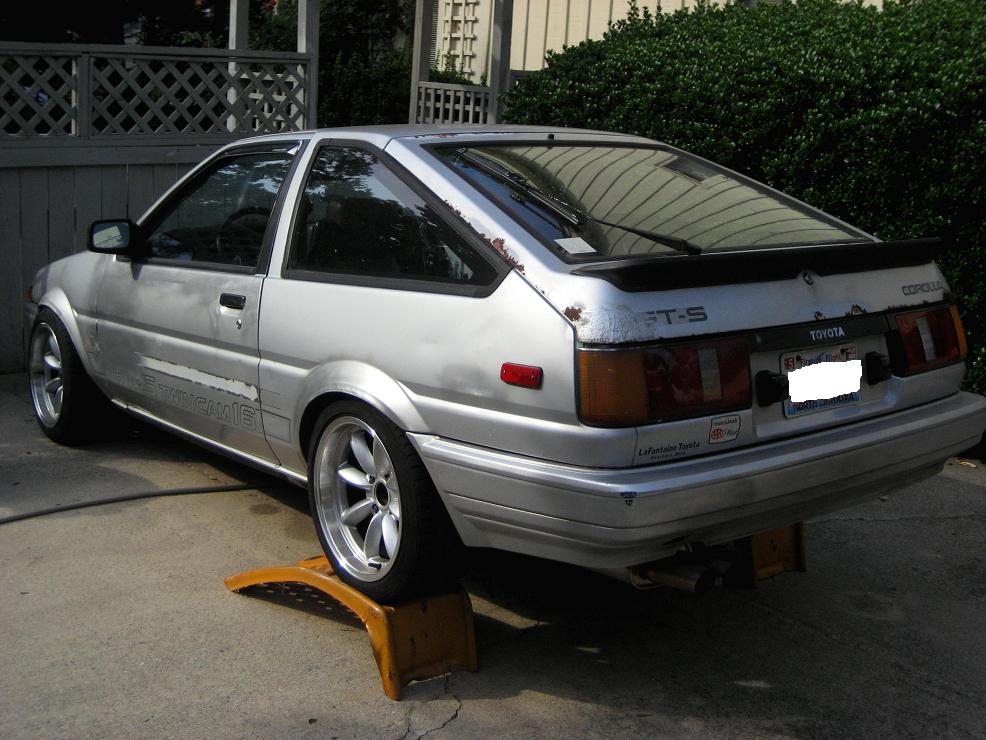
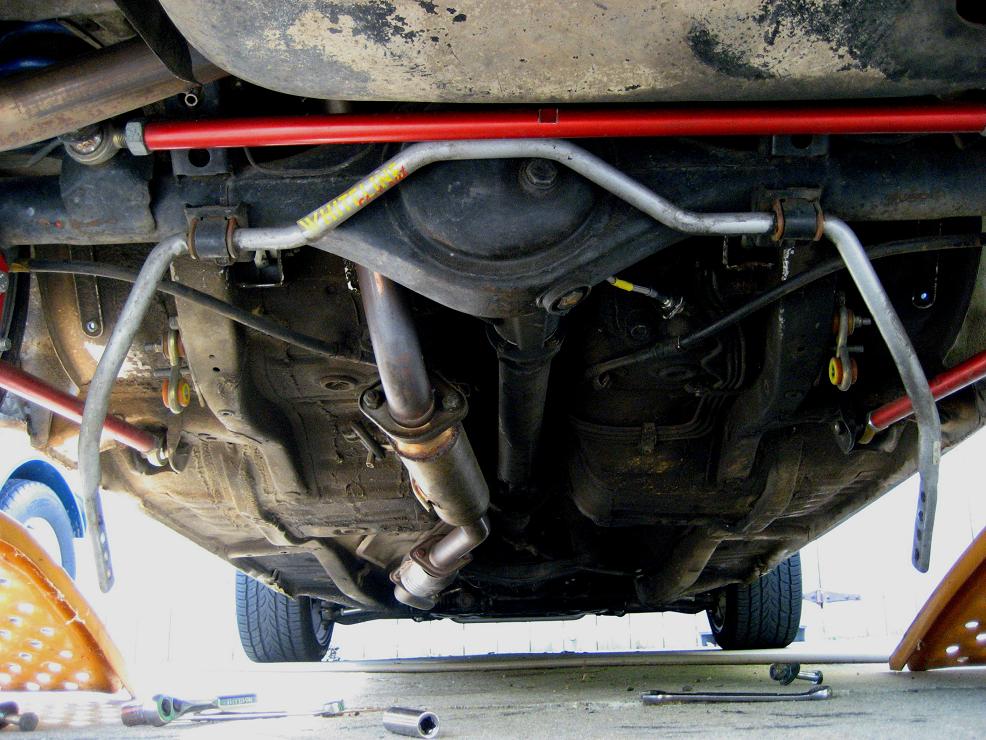
I had to do a rear anti-roll bar adjustment on my AE86 the other day, so I figured I would take pictures and do a write up on it. A lot of people overlook the role of anti-roll bars (also known as swaybars or anti-sway bars) when it comes to tuning chassis balance. You can dial in large changes in grip for the front and rear axles to compensate for the natural tendencies of the chassis you’re working with. I like to use the anti-roll bars to get the front to rear axle balance in the ballpark before fine tuning it with the damper settings on the shocks. If only damper settings are used to control body roll, the shocks will be too stiff on compression. The car’s overall grip ultimately won’t improve because it’ll start crashing over bumps and upsetting the weight of the car on the tires. Trying to tune chassis balance using only the springs and dampers is an incorrect way to implement those parts. That’s why I don’t consider an adjustable suspension setup complete until you have anti-roll bars.
Theory
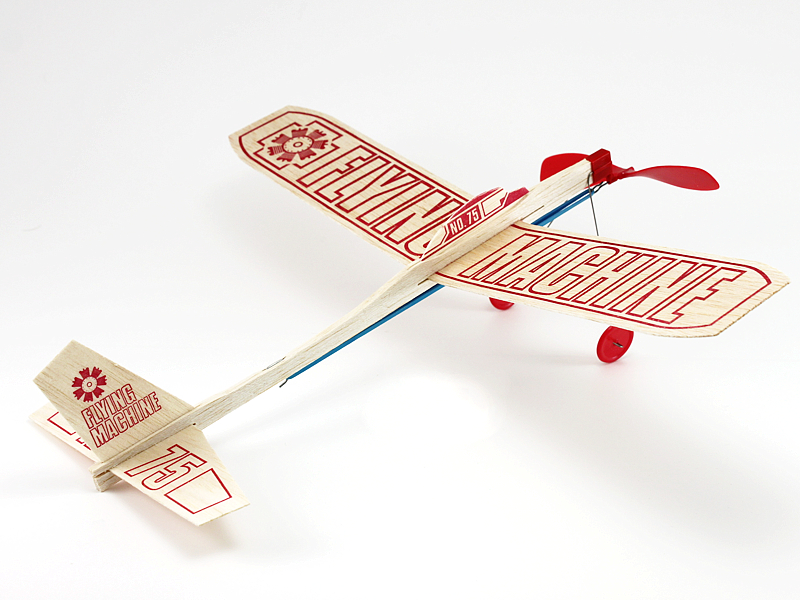
So how do anti-roll bars work? They’re torsion springs. What’s a torsion spring? Torsion is energy stored in the from of twist as a result of torque. Think of the propeller on the rubber band powered airplanes you had when you were a kid.
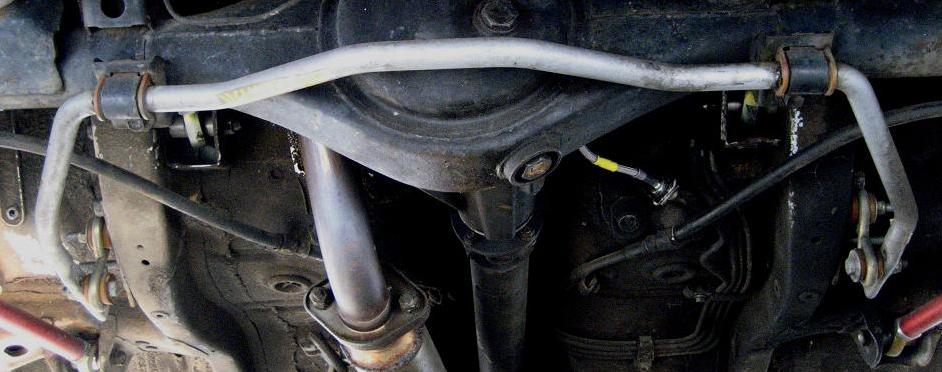
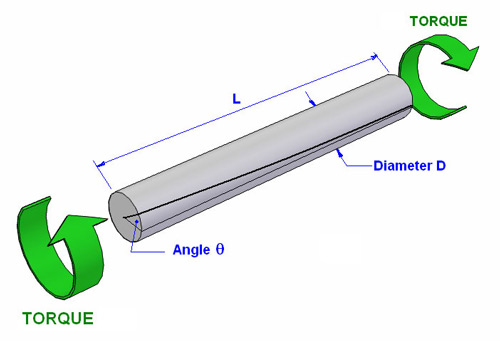
Normally a rubber band is used as a linear spring, like in a slingshot. In the case of the airplane, the rubber band’s elasticity is used as a torsion spring to store the energy from the propeller being wound up. Anti-roll bars use the elastic spring behavior of steel in a similar manner. Take another look at the picture of the rear anti-roll bar at the top of the post. Pretty much all anti-roll bars will look similar to that with a horizontal torsion section in the middle with two arms on each end. The way they function is shown in this diagram of torsion:
The bar in the diagram represents the center section of the anti-roll bar. The green torque arrows come from the force of the suspension movement acting on the arms on either end of the anti-roll bar. That means the suspension on the driver’s side of the car is connected to the suspension on the passenger side of the car through the center section of the anti-roll bar. A softer anti-roll bar will allow a greater angle of displacement (Angle θ in the diagram) which means there can be a bigger difference in the ride heights of the suspension on each side of the car. Assuming you have an even road surface, having one side of the suspension compressed while the other side is extended means the chassis has a lot of body roll. A stiffer anti-roll bar will work harder to keep the suspension on both sides at the same ride height which will cause a car to go around a corner very level without much body roll.
Practice
Now that we know why anti-roll bars are important and how they work, we’ll get into the nitty gritty part about how to install and adjust them on your car. Any time you work with an anti-roll bar, it’s a lot easier if you put the car on ramps. You don’t want to have the wheels drooping because that means you’ll have to fight to compress the springs when you go to connect the anti-roll bar. It’s definitely worth picking up a cheap set of ramps from your local auto parts store, Harbor Freight or Craigslist if you want to tinker with your settings and optimize your suspension.
When you go to install an anti-roll bar on your car, the instructions will most likely have you bolt the center section to the chassis first. The middle of the anti-roll bar (the torsion spring part) will be supported by a couple of D-shaped bushings. Chances are if you’ve bought a performance anti-roll bar, it came with polyurethane bushings. Grease these up on the outside and inside before installation to prevent squeaking. Go ahead and bolt the center section of the anti-roll bar to the car with both of the D-shaped bushings. Grab one of the arms and make sure that the center section of the bar spins freely in the D-shaped bushings. If the bar binds, then you’ll get inconsistent handling which is probably the worst problem to have when setting up a car.
What do you do if the anti-roll bar binds in the D-shaped bushings? You have a couple of options. You can take the D-shaped bushings and sand down the flat side a little bit. As with anything else involving the removal of material, try it out in small increments so you don’t take off too much. You can also put a washer under the mounting bracket for the D-shaped bushing to give it some slack. Be sure your bolt is long enough to get enough threads in if you do this.
The next step in the anti-roll bar installation is the connecting of the arms to the suspension with end-links. Since the new bar will be much stiffer than the stock one, it’s a good idea to replace the stock end-links with ones made of polyurethane or spherical bearings to get the full effect. The rubber bushings in your stock end-links will just squish instead of letting the anti-roll bar work. In some cases, the stiffer anti-roll bar can even break the flimsy stock end links. There’s no point getting a nice anti-roll bar and skimping on the end-links, so budget accordingly.
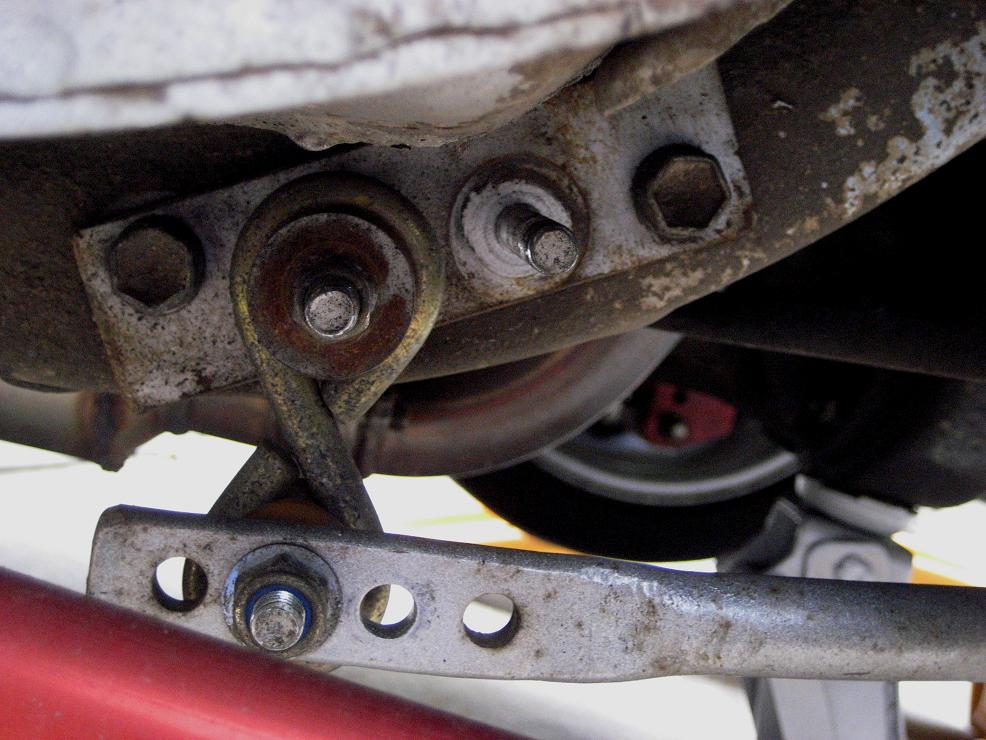
You probably noticed in the picture above that the anti-roll bar has multiple positions to mount the end-link. These positions change how much leverage the suspension force has on the torsion spring in the center of the anti-roll bar. If you bolt the end-link to the end of the arm (position furthest away from the center section of the anti-roll bar), that gives the suspension the longest lever which allows it to generate more torque (green arrows in the Torsion Diagram above) on the torsion spring in the center of the anti-roll bar. This twists the center section more (larger Angle Θ) and will allow for more body roll. Bolt the end link to the position closest to the center section of the anti-roll bar and you will minimize the amount of leverage the suspension has on the torsion spring and therefore minimize body roll. In the picture above, I have the anti-roll bar set to the second softest setting. I had it in the second stiffest setting before, which is pictured below.
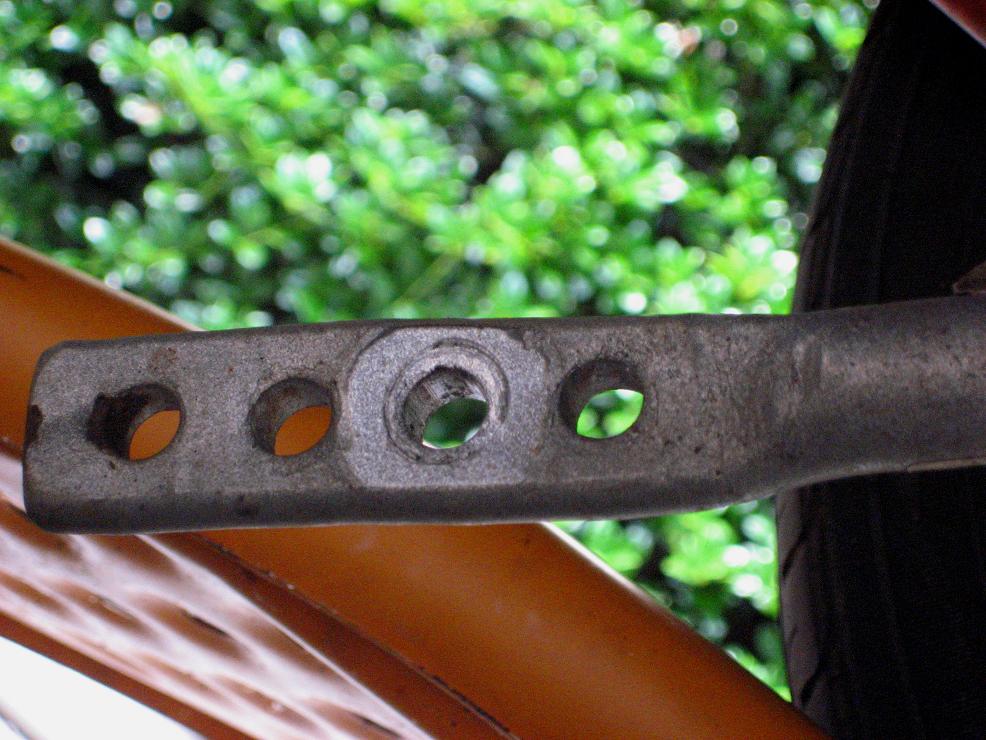
My anti-roll bar used to be in the second stiffest setting which is the second closest hole to the center section
Dialing in the perfect anti-roll bar setting will take some tinkering. It’s a common misconception that all body roll is bad and so everything suspension related should just be as stiff as possible to eliminate it. That’s not true. How stiff your suspension should be is directly related to the grip of your tires. If you’re not running super sticky rubber or you have a low friction situation, like in the rain, then you do need some body roll for optimum grip. This allows the weight of the car to transfer more which pushes tires into the road surface harder. The response will slow a little bit, but the car’s grip level and cornering speeds will be higher. Ultimately what you want to do is have matching grip levels between your front and rear axles for a neutral chassis. Making the anti-roll bars stiffer will give you more grip until you’re maxing out your tires/alignment/road conditions. At that point making the bars stiffer will reduce your grip, so you’ll have to experiment to find that tipping point. I like to do the front axle first and then match the rear to it. Fine tune with the damper settings. They work the same way, but on a much smaller scale. Softer for a little more body roll, stiffer for a little less.
Every car you set up will behave differently, so trial time behind the wheel after each setting change is critical. This will sound strange, but you can actually use Gran Turismo (not Forza, it’s not accurate enough) to get a general feel for where the settings need to be before you change them on the car.
Front / All Wheel Drive Cars
Most cars come from the factory set up to understeer, so a stiffer rear anti-roll bar  willsharpen up the front end bite. This is especially true on front wheel drive cars. A stiff rear anti-roll bar will lift the inside rear wheel of a car as it goes around a corner. Lifting the inside rear tire of the car means that it’s pushing the outside front tire of the car into the ground. That’s exactly what you need to get more grip out of the front end in a car that understeers. Just know that upgrading your rear anti-roll bar will bump you out of stock class autocrossing.
Drifting
If you’re setting up a car for drifting, then you will probably want to go pretty stiff on the rear anti-roll bar. This will keep the back of the car level in the middle of a drift which will keep the slide smooth. If the weight of the car suddenly shifts to one side, the tire on that side will suddenly gain grip and throw you out of the drift. The trade off for having smooth drifts is the car will be a bit loose when you try to grip drive with it.
Grip Driving / High Powered Cars
A lot of people like to set up rear wheel drive grip driving / road racing cars with a little bit of understeer. What this means is that there’s extra grip on the rear axle which will allow you to mash the throttle earlier coming out of turns. The driver can make up for the slight understeer on turn in by trail braking which he or she should already be doing to set a fast times. This is also what I would recommend for setting up a really high horsepower rear wheel drive car. That way when the power breaks the rear tires loose, the car will push the front tires some and stay in a relatively straight line. If the front axle has too much grip, the car will spin when the engine power breaks traction on the rear axle. Either way, you will want to set the rear anti-roll bar a bit softer to achieve the slight understeer.
Again, all of this will need to be confirmed on your own car, but hopefully this will point you in the right direction for optimizing your settings.

